Sign In
Close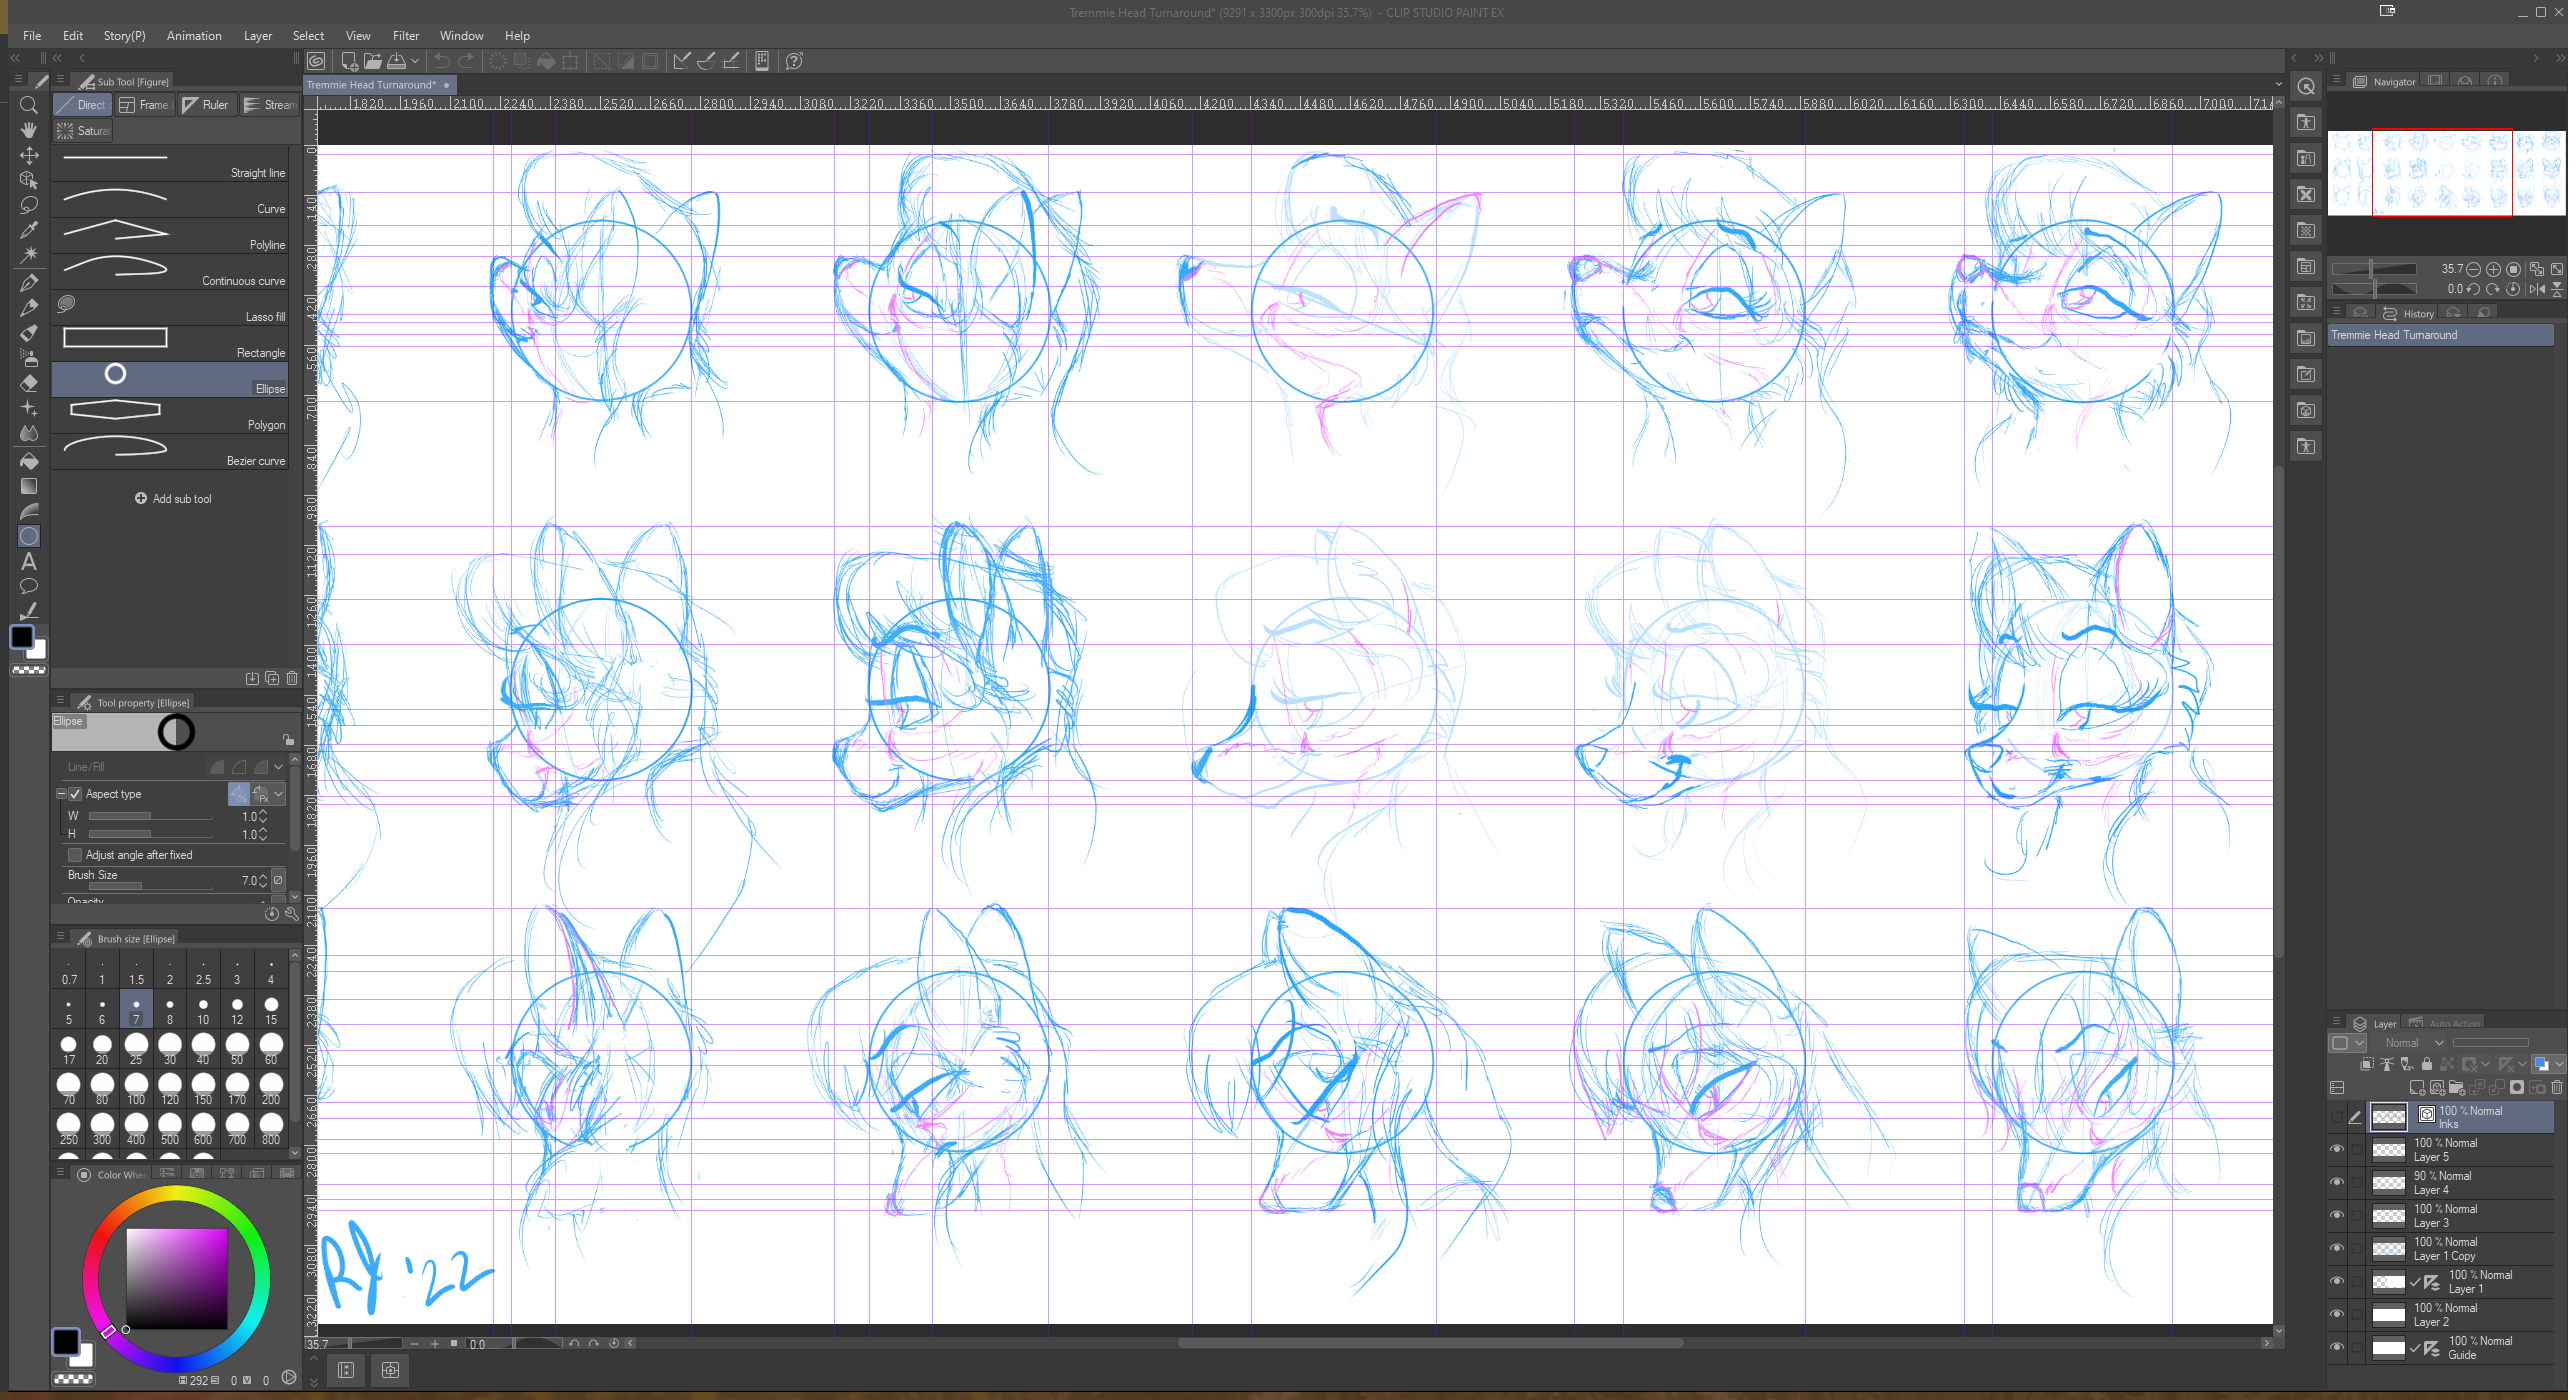
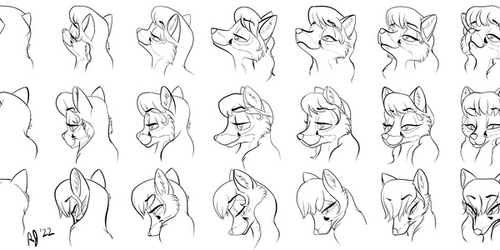
Here is how I put together my turnarounds! I felt like I didn’t really understand how my characters’ heads were supposed to look from any given angle for many years, and this really helped me visualize Tremmie’s construction.
As always with any how-to guide, your mileage may vary; you may find methods that work better for you! I’m happy to share whatever I learn. Everyone has their own way of doing things!
To start, I picked a profile (side view) of Tremmie’s head, pointing forward. I did this because I was certain I knew how long her muzzle was, and her feature placement was correct. When animals with stereoscopic vision are looking forward, their muzzle is pointed slightly downward, so their muzzle doesn’t obscure their vision.
To make life easier on myself, in Clip Studio Pro I used the Figure too, and then the Ellipse-subtool to draw a starting circle for the head.
Then, I turned on Rulers, and then made Special Rulers (Guides in Photoshop) by dragging them from the Rulers, and made them even with the top and bottom of the circles, so that all circles are roughly the same level.
Then, I picked key features that I wanted to make sure lined up! The bottom of eyes, top of nose, bottom of nose, the lip, ear tip, top of hair/headfur, bottom of ears, etc. If this isn’t done, it’s easy to draw features that “floats”, or moves around on the head in a random, inconsistent way. This forced me to draw the features starting in mostly the same place, but with the head turned.
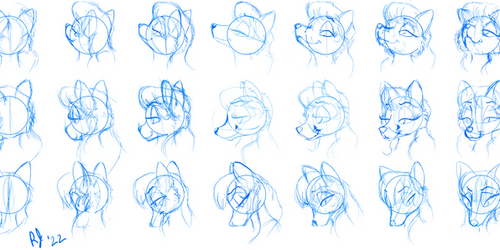
Then, I turn the head a bit! I chose eighths, roughly. Back view, slightly turned, one-quarter turned, almost side view, side view, etc. I did eighths to force myself to draw more views of the head because I wanted a really solid understanding without it feeling like too much work.
Then, for the face pointed up/pointed down, I used my guide lines to draw circles of approximately the same size, and repeated! So that I didn’t accidentally draw a muzzle too short or too long, I used guidelines from the center row to help me judge.
I used guides to mark location of features on the faces. I moved some guides I used to draw the circles and used them for other features, which is why there is a guide missing at the top of the head circle in the top row.
I am happy to answer any questions!
Submission Information
- Views:
- 133
- Comments:
- 3
- Favorites:
- 1
- Rating:
- General
- Category:
- Visual / Other
Comments
-

-

Thank you!
That's a good idea! I'll need to look into it!
-
You’re most welcome! :D
I know that when I use it, when I actually am connected to internet (I’m generally offline when I’m using it though! XD)—there’s a lot of user sharing things that pop up…..so I know you can share things with other Clip users somehow! :)
-
-
Link
keirajo
It’s such an impressive piece—I’m sure something like this will help a lot of people out! :)
I know that with a Clip account, you can share these things with other users (though I don’t know how, because I suck at internet)—I wonder if other Clip users would find this useful? :)