Sign In
Close~Progress Shots~ Manipulating layers in analog media by Sparkyopteryx

So a couple people have asked me about layer manipulation in the case of analog art since I’ve mentioned it in passing here and there in the past. Since this current commission features me using this ingenious technique, I remembered to actually take pictures to document it. Explanation below:
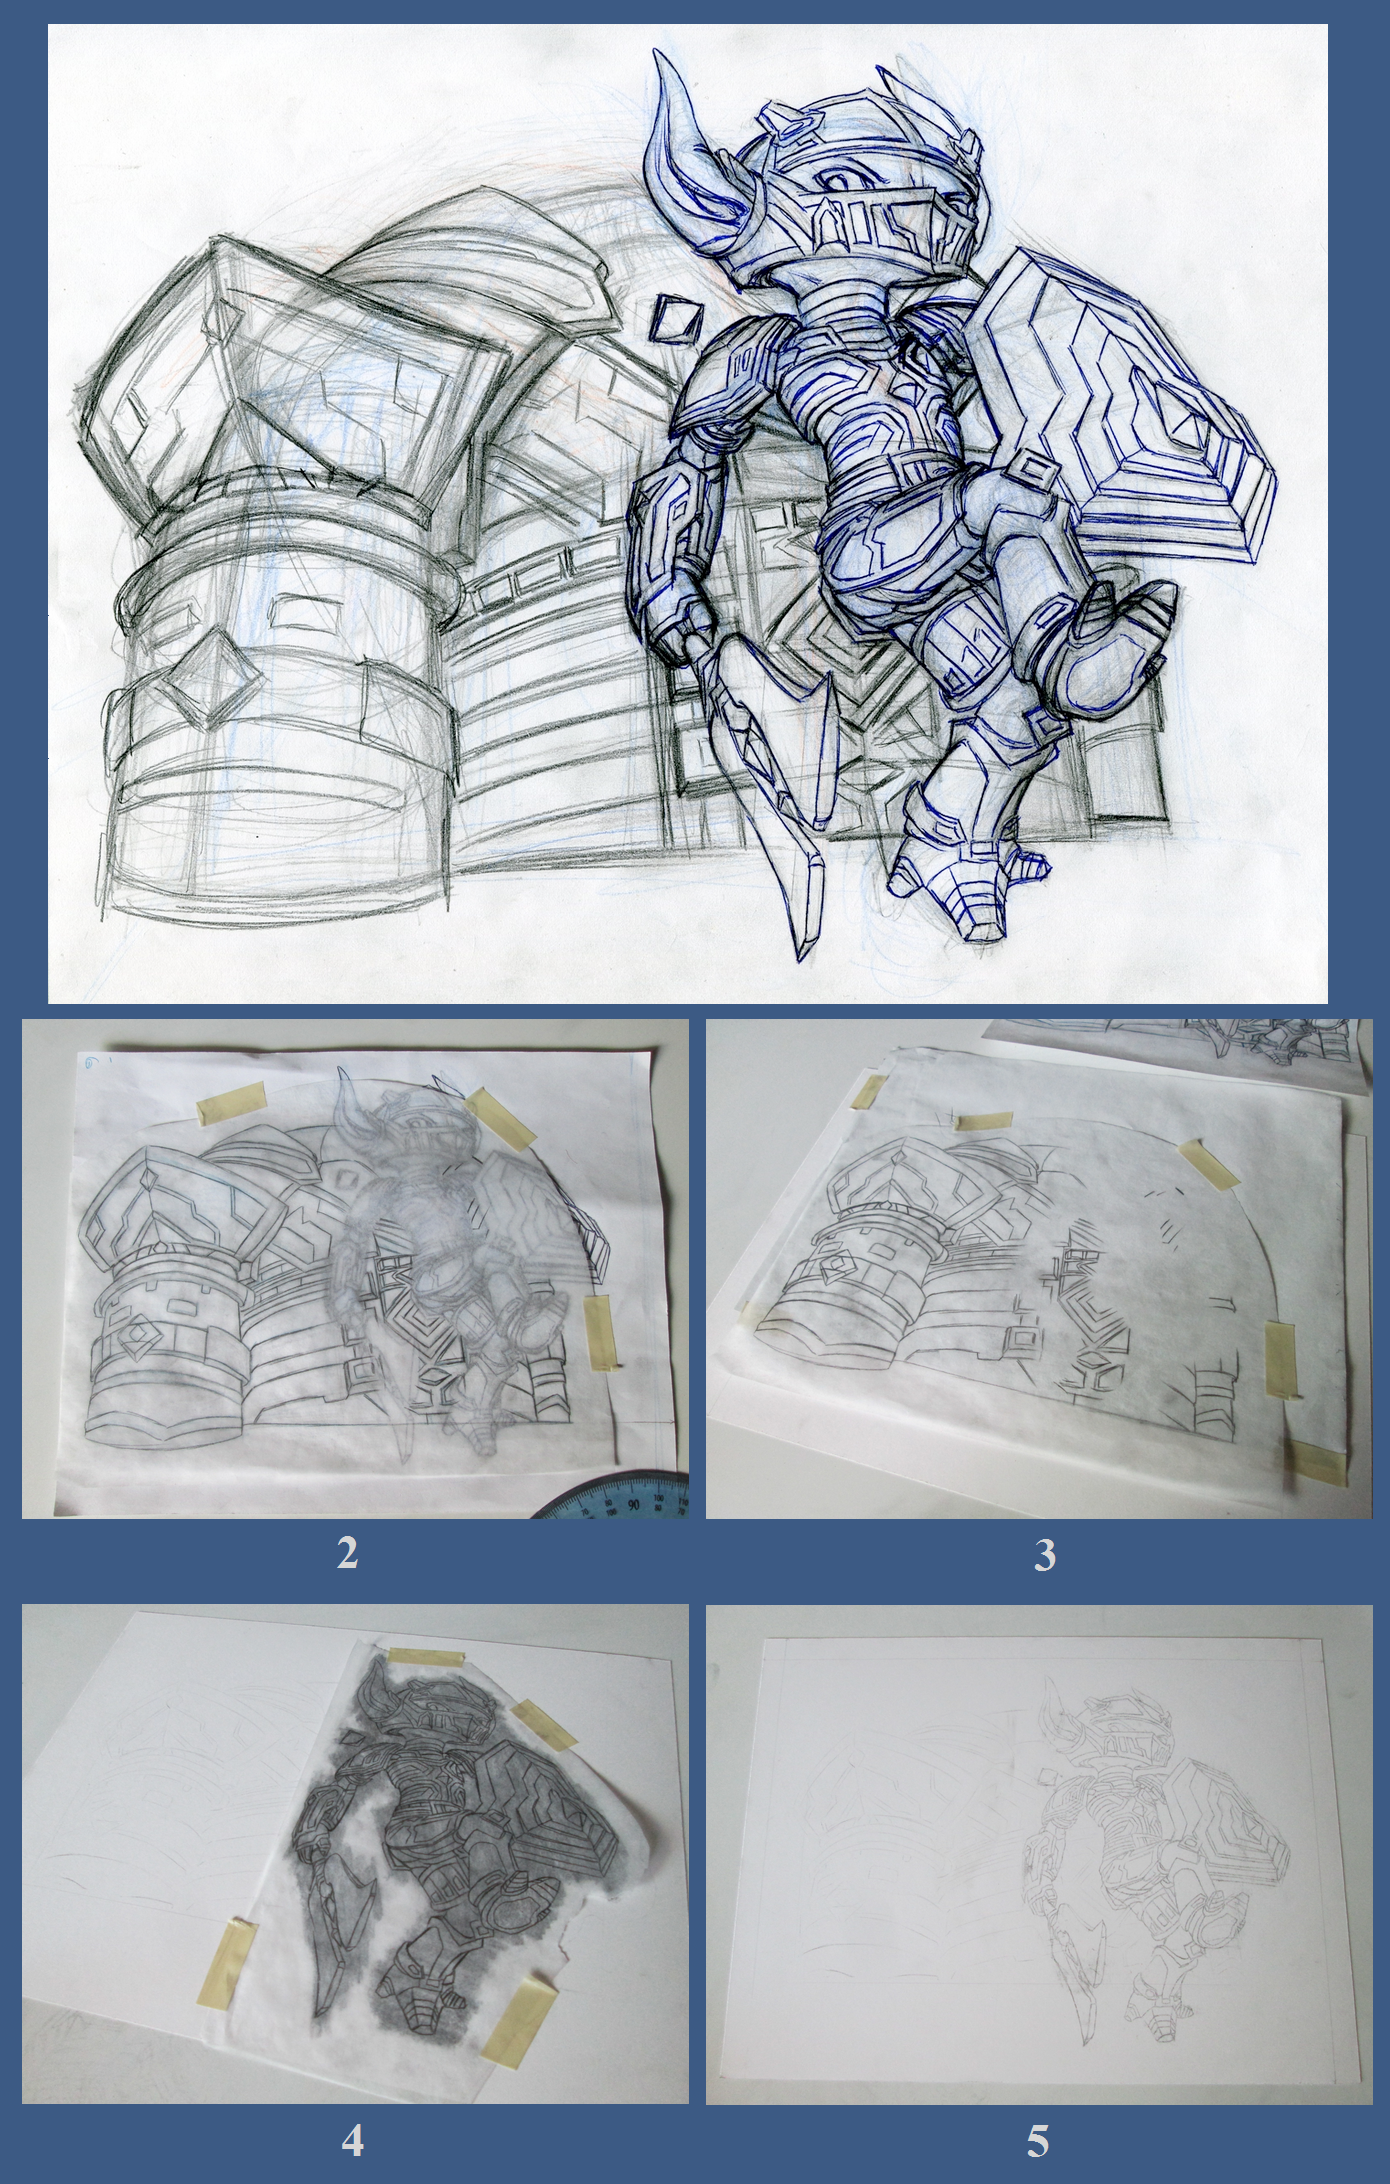
The first image shows the raw (and messy!) finalized sketch. This is the image I trace it from. I like it, it looks good but I was dissatisfied with how I positioned Snaxx; I want him to be a little lower down on the page and angle adjusted slightly to better imply him jumping out and falling downward. So this means two separate traces and transfers, effectively creating two “layers” to manipulate using the tracing paper.
Step 1 (not pictured)- I take a sheet of tracing paper and trace Snaxx himself but not the golem suit as I typically do with most images. Once done with this I set him aside for now.
Step 2- I use a seperate, clean sheet of tracing paper and trace the golem. There will be gaps from where Snaxx overlapped in the original sketch and certain details may be hidden or revealed depending on how I’ll position him, but I’ll be fixing and adding that in after transferring (this is why I always keep the sketch and my references on hand). I now have two transfer “layers,” one for the golem and one for Snaxx.
Step 3- Taking out the bristol for the eventual final polished image, I measure out margins and determine where the golem is going to go first. The suit is basically a background and so will be static once I transfer it. Sometimes I’ll transfer with graphite paper and sometimes I’ll simply put a layer of 4B graphite on the other side of the tracing paper. I use the paper for the golem as graphite paper creates fainter but more “fixed” (read: Less likely to smudge) lines, perfect for a background element. I’ll use the graphite wash technique for Snaxx since it makes the lines stand out more, but they’re less permanent.
Step 4- With the transfer lines of his golem suit now on the bristol, I can transfer him now. But not before I fiddle with how I’m going to put him on the page (since this was the reason I did this in the first place). I try a couple of different angles before I’m satisfied. The transparency of the tracing paper makes this perfect as I can see where he’ll be in relation to the rest of the image and to make sure I don’t accidentally put him too close to the margin.
Step 5- Transferring finished! My layers are now effectively merged, with Snaxx positioned on the page more to my liking. I’ll be cleaning up the page a fair bit and going over some lines with pencil but after that I’m ready to ink. I’ll be inking him first as his lines are bolder but more likely to smudge and rub off. Doing it this way does take a bit more time but guarantees I’m 100% happy with the composition as I move forward to the final stages.
Submission Information
- Views:
- 575
- Comments:
- 0
- Favorites:
- 0
- Rating:
- General
- Category:
- Visual / Sketch