Sign In
Close


You can see a video of the finished thing right here: https://twitter.com/FurtasticStudio/status/753074110968782848
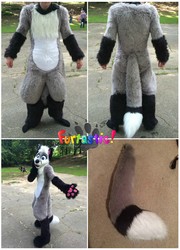
First, an overview. These were all handsewn and made using marine vinyl for pawpads, fleece for lining the fingers, seal/beaver fur, and luxury shag for the wrist. These are for a premade that will be finished later this year.
Materials: Fur(any kind, but you should either use seal fur or shave down longer fur for the palms), pawpad material(fleece or vinyl), finger lining material(I used fleece but anything soft will do), paper or similar for pattern making, pins and/or wonder clips(I used both), stuffing, and basic sewing materials.
The order of steps is left to right, top to bottom.
First, make your pattern. There are three basic pieces here. On the left is the back piece with the fingers being the lining pieces. Middle is the top of the finger, which is used for all the fingers. It has a dart in it to give it the curve. On the right is the bottom piece with pawpad shapes cut out. What I did was make the bottom piece(on the right) first. I then traced another piece the same size for the back. I measured the circumference of the finger circles and drew out a rough fortune cookie shape with the outside being that measurement. The sides of the dart have to be the same length.
These are all the pieces I used, 30 in total. Front and back pieces, finger fortune cookies, vinyl pawpads, and fleece linings.
First, I get those pawpads out of the way! I double handsew them with a straight stitch but if you have a sewing machine you should use it, they're not fun. You should look up a tutorial on how to applique pawpads, it's probably much easier. I also sew the finger darts together on this step, not shown. If you want claws, sew them into the finger darts!
Pin it together! The finger pieces should be in the middle, fur facing inwards. The dart lines up with the middle of the fingers, where the claws would go. I use that claw mark on the pattern to line things up.
I sew the perimeter together first, leaving the inner seams open for the stuffing. Make sure you sew over the space between the fingers a few times so it's secure.
Next, I sew the inner seam, stuffing each finger as I go. Usually what I do is sew that finger halfway, turn that finger right side out, stuff it a good amount, then turn it inside out again and finish sewing.
Then I sew the cuffs on, turn them right side out, pick the fur out of the seams and they're done!
Note that this is how I did it, feel free to experiment and try your own method! Most people build the fingers up with foam first, which might be easier for beginners. If you have any questions, leave a comment, I'm happy to help! Now go and make some paws!
Submission Information
- Views:
- 7868
- Comments:
- 2
- Favorites:
- 3
- Rating:
- General
- Category:
- Visual / Sewing / Knitting
Comments
-

-

Hey! First nice tutorial I've seen, Nice icon. Ehehe.
Link
NightWolf714
I was just wondering how to go about making something like this. Thank you so much for posting up a tutorial. bookmarks