Sign In
Close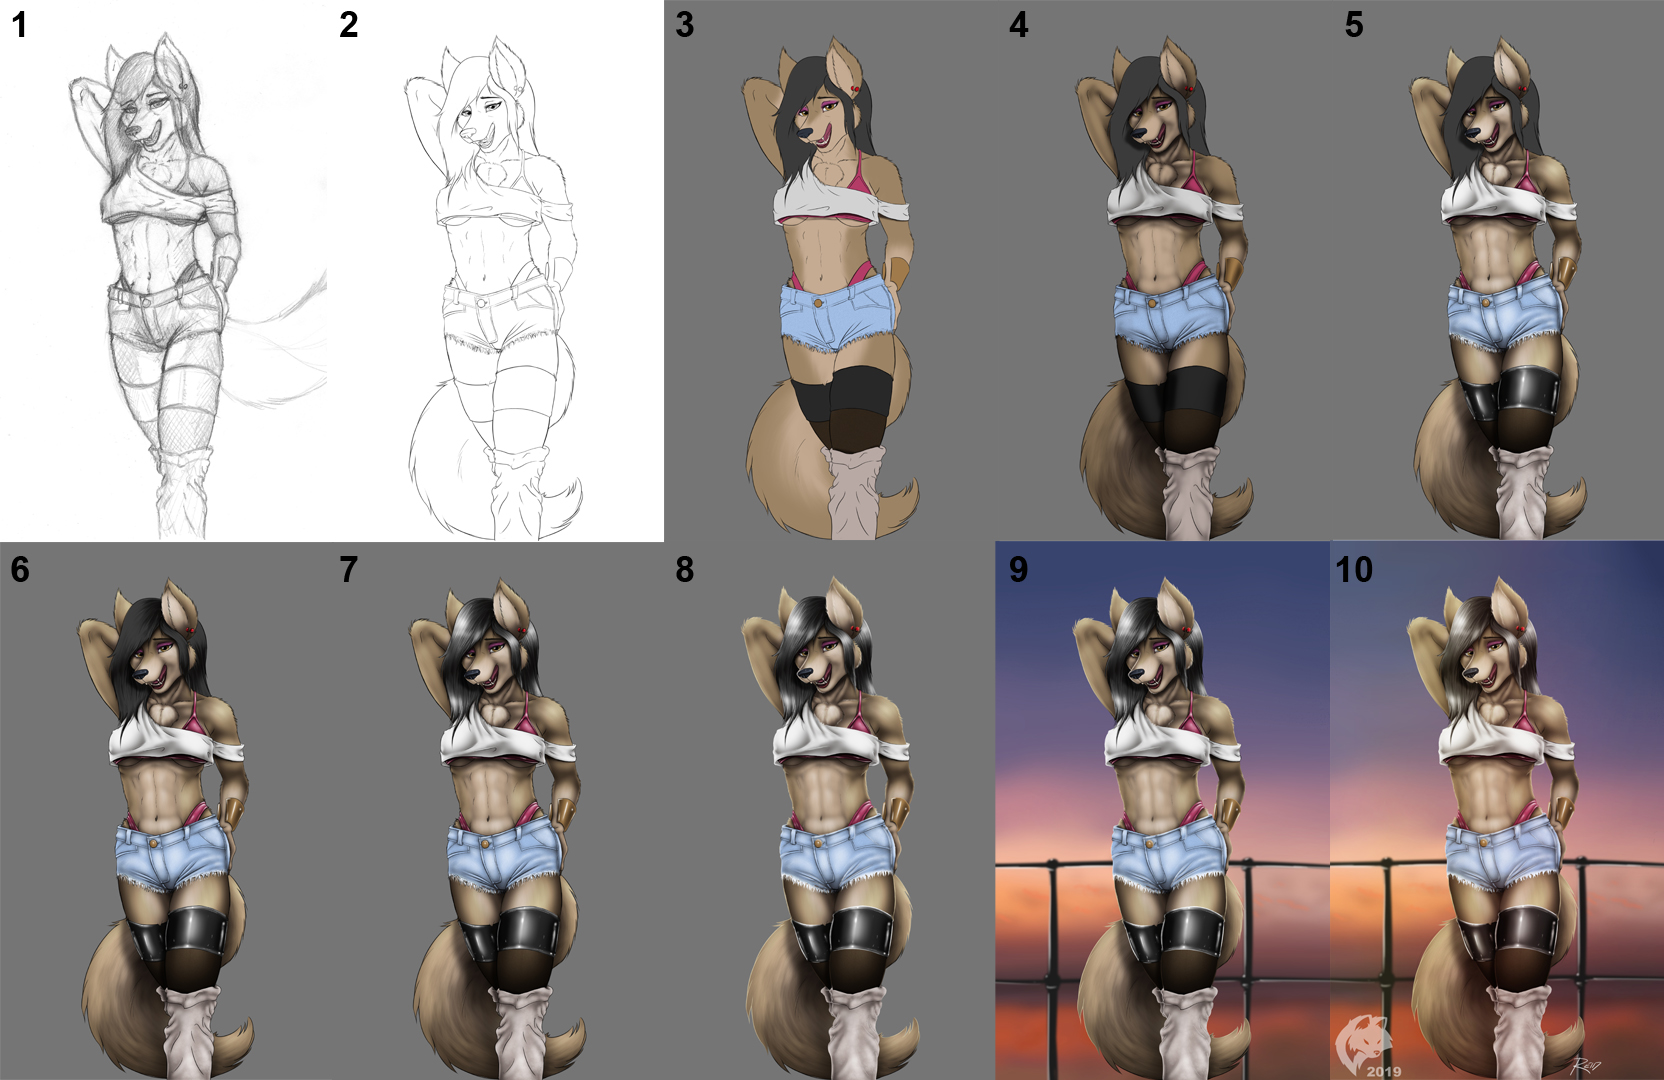


Hey guys
A few days ago, I was watching one of imrichbeeyatch's speed paint videos and got to thinking about my process and textures. So, over the last few days I've been experimenting with a new colouring method to speed up my workflow. I had some real success so thought I'd share the basics of the process with you.
Pencil sketch. Yup, I'm still a dragon and work with paper and pencil to do my sketch work. Don't ask why, but I'm just more comfortable with it and I find I can keep a better grasp of scale when I can see everything at once. The sketch isn't perfect and I did have notes all over the place on this one before I cleaned it up.
Inks. Currently I'm using Manga Studio 5 (Clip Studio 4) for doing my digital paintings. When it comes to doing ink work, I prefer using the dense watercolour brushes at a size of around 8 - 15 depending on what I'm doing.
Flat colours. A small but significant thing I learned in the last few years is to have a neutral background to work against. 1, it's not as harsh on your eyes, and 2, I find it really helps with viewing colour balance on the main image.
Shadows. This was a first for me with shadows. I usually work with 3 - 4 layers when painting in shadows. this time I only used 2. the first was for the bulk of the shadows, and the second was for adding deeper shadows. Notice I haven't dont the hair shadows here, I'll explain that shortly.
Highlights. Using the airbrush and a custom eraser I blocked in the highlights for the fur to give some texture and definition to the shadow layers.
6 & 7. Hair shadows and highlights. Starting with the hair shadows, I blocked them in with a heavy pen then smudged them using the finger blend tool. With the highlights I used the dense water colour brush to block in the sharpest highlights and thenlayed over the top with a larger airbrush to generate larger light areas and to help blend the sharp strands with the rest of the hair.
Ink adjustments. To make the inks blend better I locked their transparent pixel layers and used the airbrush to soften the lines using colours closer to the area they are next to.
Paint in background. For this, I grabbed a reference photo and used it to pull a variety of sunset colours onto the canvas. There were thououghly blended and blurred to look like a natural sunset. (this would normally be tough for me because I'm actually colour blind). The railing was blocked in with a pan, then blurred and highlighted with the airbrush tool. In total, the background was constructed on two layers.
Final details and filters. This is where I look for any small details I missed earlier and apply atmospheric filters if needed. Also a good idea to sign your work at this point too.
I hope you like this and find some inspiration for your own work.
Thanks to imrichbeeyatch for being the source of inspiration behind this and for having a speed paint video on youtube.
Please leave comments if you found this useful for your own work.
Tess the Test Wolf is © Ghostwolf (me)
Submission Information
- Views:
- 165
- Comments:
- 0
- Favorites:
- 3
- Rating:
- General
- Category:
- Visual / Digital